Process

Filming of the video

Filming the area that I needed for my 360 video allowed me to use 360 camera that filmed the front 180 degrees and the rear 180 degrees separately but at the same time. This meant that when the footage to imported into After Effects, the two video streams can be pieced together to make the 360 degree video.

Importing the video and stitching

After filming, I imported the footage into After Effects and “stitched” the 2 halves together. Stitching is where you have 2 videos of 180 degrees and to piece them together there has to be a very subtle stitching line where it is possible to see the separation of the 2 videos. This is usually done by lining up the stitch with an unimportant area within the video and/or along a natural, real life line (such as a notice board on the wall.

Pasting the designs

Next, I transferred the Photoshop designs from the previous semester and brief. Due to the original files being 2 dimensional designs, I had to apply a 3D effect to them. This allowed me to be able to scale and move as I would have been able to normally but this also includes along the Z axis. Usually when an image is moved around, it is just being moved around on the X and Y axis. The Z axis, however, allows the user to give an item depth by moving it backwards within the video.

Orientation

Getting the orientation was tricky, I had to make sure that the designs looked as realistic as possible within the environment. The first design that I placed was the University of Worcester design. This turned out to be the easiest design to move around and get me used to moving elements in 3 dimensions because I was able to match up the corners of the design to the corners of the window.

Cutouts

To make the designs look as realistic as possible, I needed to cutout the parts of the banister and window that would not have the designs on. To do this, I used masking. Masking is done by using the pen tool to map out a shape and then I can apply a different effect for what I want the mask to do. In this situation, I used the subtract feature as I drew around the areas that were not glass because having the design on surfaces that were not transparent wouldn’t be necessary because those areas wouldn’t have projected the design onto the wall, either way. I also lowered the opacity on the designs, to give the illusion that they were applied to a window or glass but were still letting light in.

Duplicating and enlarging

For the projection effect, I duplicated the designs and moved them along the X axis. Due to the 3 dimensional aspect, this meant that the design ended up flipping and being the “correct” way round on the wall. It was key that I duplicated the exact layer that I had been working on, masks and all. This is because any parts that light couldn’t get through would cause a shadow on the projection. I then enlarged the projection as the projection would be bigger that the transfer. Creating this video allowed me to think in a realistic way, not just in a design aspect because when a light source shines through an opaque item or design, the projection is larger than the original. After lowering the opacity again on the projection, I then made sure that they complied with the structure of the wall as there are small pillars and indents that would make the projection fall differently.

Optical illusions attempt

My optical illusion design was originally to be made within the 360 video but, although it was possible to place, the illusion would not have been seen so it would have just looked like 2D images pasted in the environment. The reason that this design didn’t work in 360 degree videos is because, to fully see the illusion, the user needs to stand in front of the design to be able to see what it says and then step to the side to see how much of the design can no longer be read and how it would just look like patterns and lines. This is not possible in a stationary format, such as 360 degree video.

How to make the optical illusion work

Had we been making a movable virtual reality experience and not a stationary video, the optical illusion would have worked. A virtual reality experience can range from a simple video, to a full game. The virtual reality experience that would work with this optical illusion would be the type where the user can walk around a little bit, within a small area as that would allow for the user to see the words on the wall and window and then take a step to the left or right and then be unable to read the words but see the pieces of them.

Filmmakers and Ethics

How filmmakers are using 360

Filmmakers are not using 360 videos as a way to revolutionise movies, hence why there aren’t any cinema theatres that are circular and have screens around the outside. I believe that this is because a story-driven medium, like a film, would be hindered by allowing the audience to look around in 360 degrees. The reason for this is because parts of the plot could be missed entirely if the audience is looking the wrong way. This would mean that steps would have to be taken to ensure that the audience is looking the correct way at the correct time in which case, why not just shoot the film with traditional cameras? Some ways could work, such as educational films about nature or stars and space, because that would allow the audience to feel like they are exploring what they are learning. This is already used in museums for things such as planetariums.

Ethical concerns

The ethical concerns related to 360 filming are no different to that of normal filming and photography. These consist of people being aware that they are in the film or photo and if they are okay with it, providing that they are not in a public place. If they are in a public place, they are not legally allowed to do anything about it, unless the filming is actually singling a person out and they are being followed. The ethics behind drone filming vs normal filming is different as the drone can reach places where the normal film cannot. This does not apply to 360 vs normal as the camera will be either handheld or on a rig, just like a traditional camera. The only issue that 360 cameras can bring up is that, because it faces 2 ways, the public does not know if they are being filmed or not. However, due to smartphones having both a front and a rear camera, this potential issue is not unique.

Spatial and Ambisonic Sounds

Spatial sounds are a more advanced version of surround sound. Surround sound is where there are multiple (between 2 and 7) that are either laid out in a room (such as living room or cinema theatre) or within a headset. The limitations of surround sound is that the sound from the speakers can only be level with the subject’s ears. It creates the hearing illusion that a helicopter is going overhead because the sound begins loud in the speaker behind the subject and “travels” to the front speaker but the sound never truly goes over the person’s head, just from behind to in front.

Spatial sounds claim to be full 360 degrees around the subject’s head. This method would allow gaming and films to be more immersive and engaging for the audience because they will hear what is going on around them, not just what’s happening in the game or film. With this audio technique, they will fell as though they are within the media, not just observing it.

Windows Sonic
Windows 10 Imagery of Spatial Sounds vs Surround Sound

With Spacial Sounds and Virtual Reality, together, it could mean that gamers and film watchers could end up being fully immersed in the world that they are “living” in. This combination could end up being the final piece in the puzzle for allowing humans to actually live in virtual worlds in the future.

Created in the 1970s, Ambisonic were invented for full 360 degree audio. This Ambisonic sound does create 3 dimensional sounds but it is mainly used to pinpoint the exact location a sound is coming from. This is why it has not been used for things like VR gaming and 360 degree videos.

Pretty much the same misunderstanding is widespread when it comes to Ambisonic. Ambisonic is a system developed in the 60s / 70s. Today it is mostly a delivery format to be able to decode a specific location of a sound into a wide range of speaker setups, one being binaural for headphones. That means there is no need to have native Ambisonic recordings to deliver audio in Ambisonic format for VR or 360° videos to create a 3D environment. Not at all!

(Why we don’t use Ambisonic Microphones – even for VR | BOOM Library, 2019)

References

Manion, T., 2017. Windows 10 Tip: Make Your Movies And Games Sound Better With Windows Sonic | Windows Experience Blog. [online] Windows Experience Blog. Available at: <https://blogs.windows.com/windowsexperience/2017/11/13/windows-10-tip-make-movies-games-sound-better-windows-sonic/&gt; [Accessed 5 May 2020].

waves.com. 2017. Ambisonics Explained: A Guide For Sound Engineers | Waves. [online] Available at: <https://www.waves.com/ambisonics-explained-guide-for-sound-engineers&gt; [Accessed 5 May 2020].

BOOM Library. 2019. Why We Don’T Use Ambisonic Microphones – Even For VR | BOOM Library. [online] Available at: <https://www.boomlibrary.com/blog/why-we-dont-use-ambisonic-microphones-even-for-vr/&gt; [Accessed 5 May 2020].

360 Video/VR Research

◦ Walt Disney’s Circle-Vision 360 (1967)
One of the earliest versions of videos that spanned the full 360 degrees was a cinema of sorts created by Walt Disney in 1967. This was achieved by using multiple cinema projectors that would piece together to recreate the entire room for the audience who would be standing in the centre of the auditorium.

◦ Hurricane Katrina (2008)
The earliest documented use of 360 degree videos in news was for the report on Hurricane Katrina in 2008. This was used to show the devastation that the hurricane caused without having to film the area multiple times. This allowed the audience to spin the camera round by themselves and see the devastation “first hand” without having to be subjected to the one camera angle that the camera crew chose when reporting on the incident. 360 videos really gave freedom to the viewers in a way that hadn’t been done before as they could choose where to look.

◦ Expensive Equipment
When this video format first began, if anyone wanted to create a 360 video, they would have to used special equipment that would be very expensive or use multiple cameras to film all 360 degrees. In recent years, especially with the creation and affordability of Virtual Reality headsets, it is now easier than ever for someone to film a 360 degree video. GoPro 360 cameras are still between £200 and £400 but are much more affordable than 360 cameras from a decade ago.

◦ Facebook and YouTube (2015)
Due to platforms like Facebook and YouTube being among the first to allow 360 videos, accessing created videos became easier which, for a while, spurred a trend of videos being created and also a surge in panoramic photos.

◦ News Sites
As mentioned previously, Hurricane Katrina was covered by a news site using a 360 video but later on, when Facebook and YouTube started allowing that format of videos, more news sites started using 360 videos to draw more attention to what they had to say.

◦ VPL Research
Pioneers in virtual reality were VPL Research in 1985 as they were the first ones to sell VR googles and gloves as well as some other products that would be used to enhance the experience.

◦ Training Astronauts
In 1989, NASA officially launched a program to train future astronauts using virtual reality. This was used as a way to simulate the visuals and audio of being on a space station, in a rocket and even on the moon.

◦ Google Street View
A form of virtual reality that most people gloss over and forget about is Google Street View. This was created as an add-on to Google Maps to allow users to see exactly where they would be going, for example, and what the roads and surrounding areas look like.

◦ Oculus Rift Kickstarter (2012)
In August 2012, Oculus launched a Kickstarter (crowd-funding project) for the Rift, a fairly pricey VR gaming headset. The Kickstarter was incredibly successful with Oculus receiving $2,437,429 in a single month. This caught the eye of Facebook and in 2014, Facebook bought Oculus for $2 billion, clearly seeing some potential.

◦ Oculus Rift, PSVR and HTC Vive launch 2017
3 years later in 2017, Oculus Rift launched as well as some competition from other companies. HTC being direct competition as the Vive was also for gaming PCs, like the Rift, whilst also being sold at a similar price point. Sony also got in on the VR action by releasing the PlayStationVR unit which was noticeably cheaper than the Rift and Vive but was not as powerful or as high quality as the headset ran off the PlayStation 4 instead of a PC. This turned out to not be a negative though as it allowed some gamers who couldn’t afford the $1,000 for the headset as well as around another thousand dollars for a PC that could run it, to experience virtual reality within their own homes. Since then, there have been a lot of high quality games that have been made for all headsets.

References

Shukla, U., 2018. An Introduction To 360° Video. [online] Knight Lab Studio. Available at: <https://studio.knightlab.com/results/storytelling-layers-on-360-video/an-introduction-to-360-video/&gt; [Accessed 5 May 2020].

Barnard, D., 2019. History Of VR – Timeline Of Events And Tech Development. [online] Virtualspeech.com. Available at: <https://virtualspeech.com/blog/history-of-vr&gt; [Accessed 5 May 2020].

Dormehl, L., 2017. 8 Major Milestones In The Brief History Of Virtual Reality. [online] Digital Trends. Available at: <https://www.digitaltrends.com/cool-tech/history-of-virtual-reality/&gt; [Accessed 5 May 2020].

Barker, S., 2020. Is A New PSVR Launching Alongside PS5 This Year?. [online] Push Square. Available at: <http://www.pushsquare.com/news/2020/01/is_a_new_psvr_launching_alongside_ps5_this_year&gt; [Accessed 5 May 2020].

Kickstarter. n.d. Oculus Rift: Step Into The Game. [online] Available at: <https://www.kickstarter.com/projects/1523379957/oculus-rift-step-into-the-game/posts&gt; [Accessed 5 May 2020].

Why Channel 4

Channel 4’s example of optical illusions encouraged further research into the company itself, as well as logos and other idents that they might have used.

First air date of Channel 4 was the 2nd November 1982 and their original logo showed the 4 being split into individual rectangles and squares.

Channel 4’s First Logo

There have been other iterations of this logo but the main design remained the same. The next one adopted the plain black and white style which stayed throughout the 27 years that Channel 4 has been around for. One iteration had the 4 within a circle and during that time period, the idents had 4 circles in total in different layouts like the four on a dice.

The Evolution of the Channel 4 Logo

Found on Channel 4’s own site is a statement on why the television channel was set up in the first place:

“Channel 4 was set up with a unique model as a ‘publisher-broadcaster’, meaning that we do not have any in-house production, but instead commission content from production companies throughout the UK… We are a self-sufficient business that reinvests all profits back into programmes, at zero cost to the taxpayer.”

Channel 4 from https://www.channel4.com/corporate/about-4/who-we-are/what-is-channel-4 accessed on 10th December 2019

Despite the logo, at the core, being the same since the channel’s inception, the first ident that included the aforementioned optical illusion was in 2004. They then created 19 more to use over the next 3 years.

From my research, I can conclude that the logo was not created for the sole purpose of using this optical illusion ident style, as I initially thought.

Glass Design

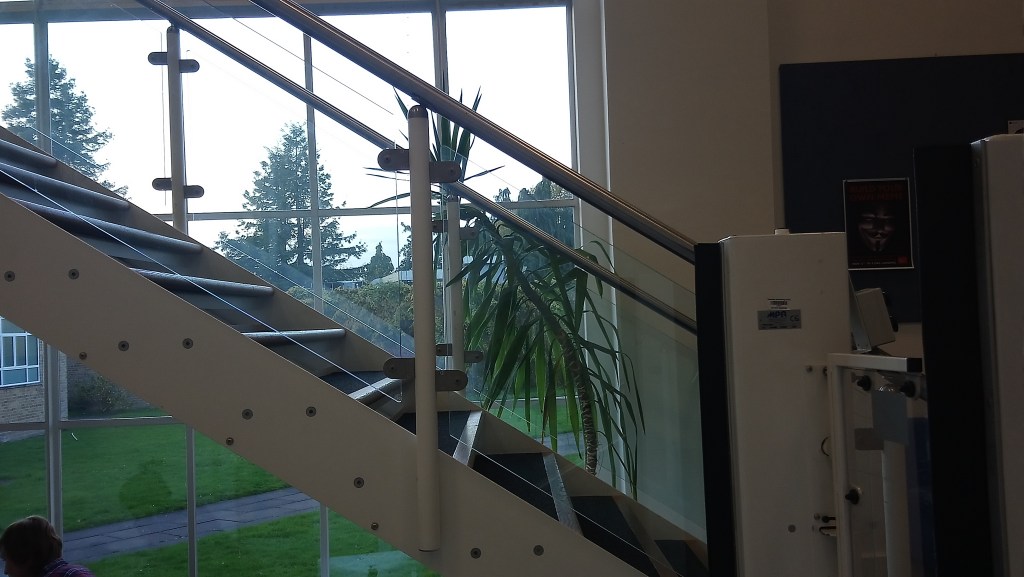
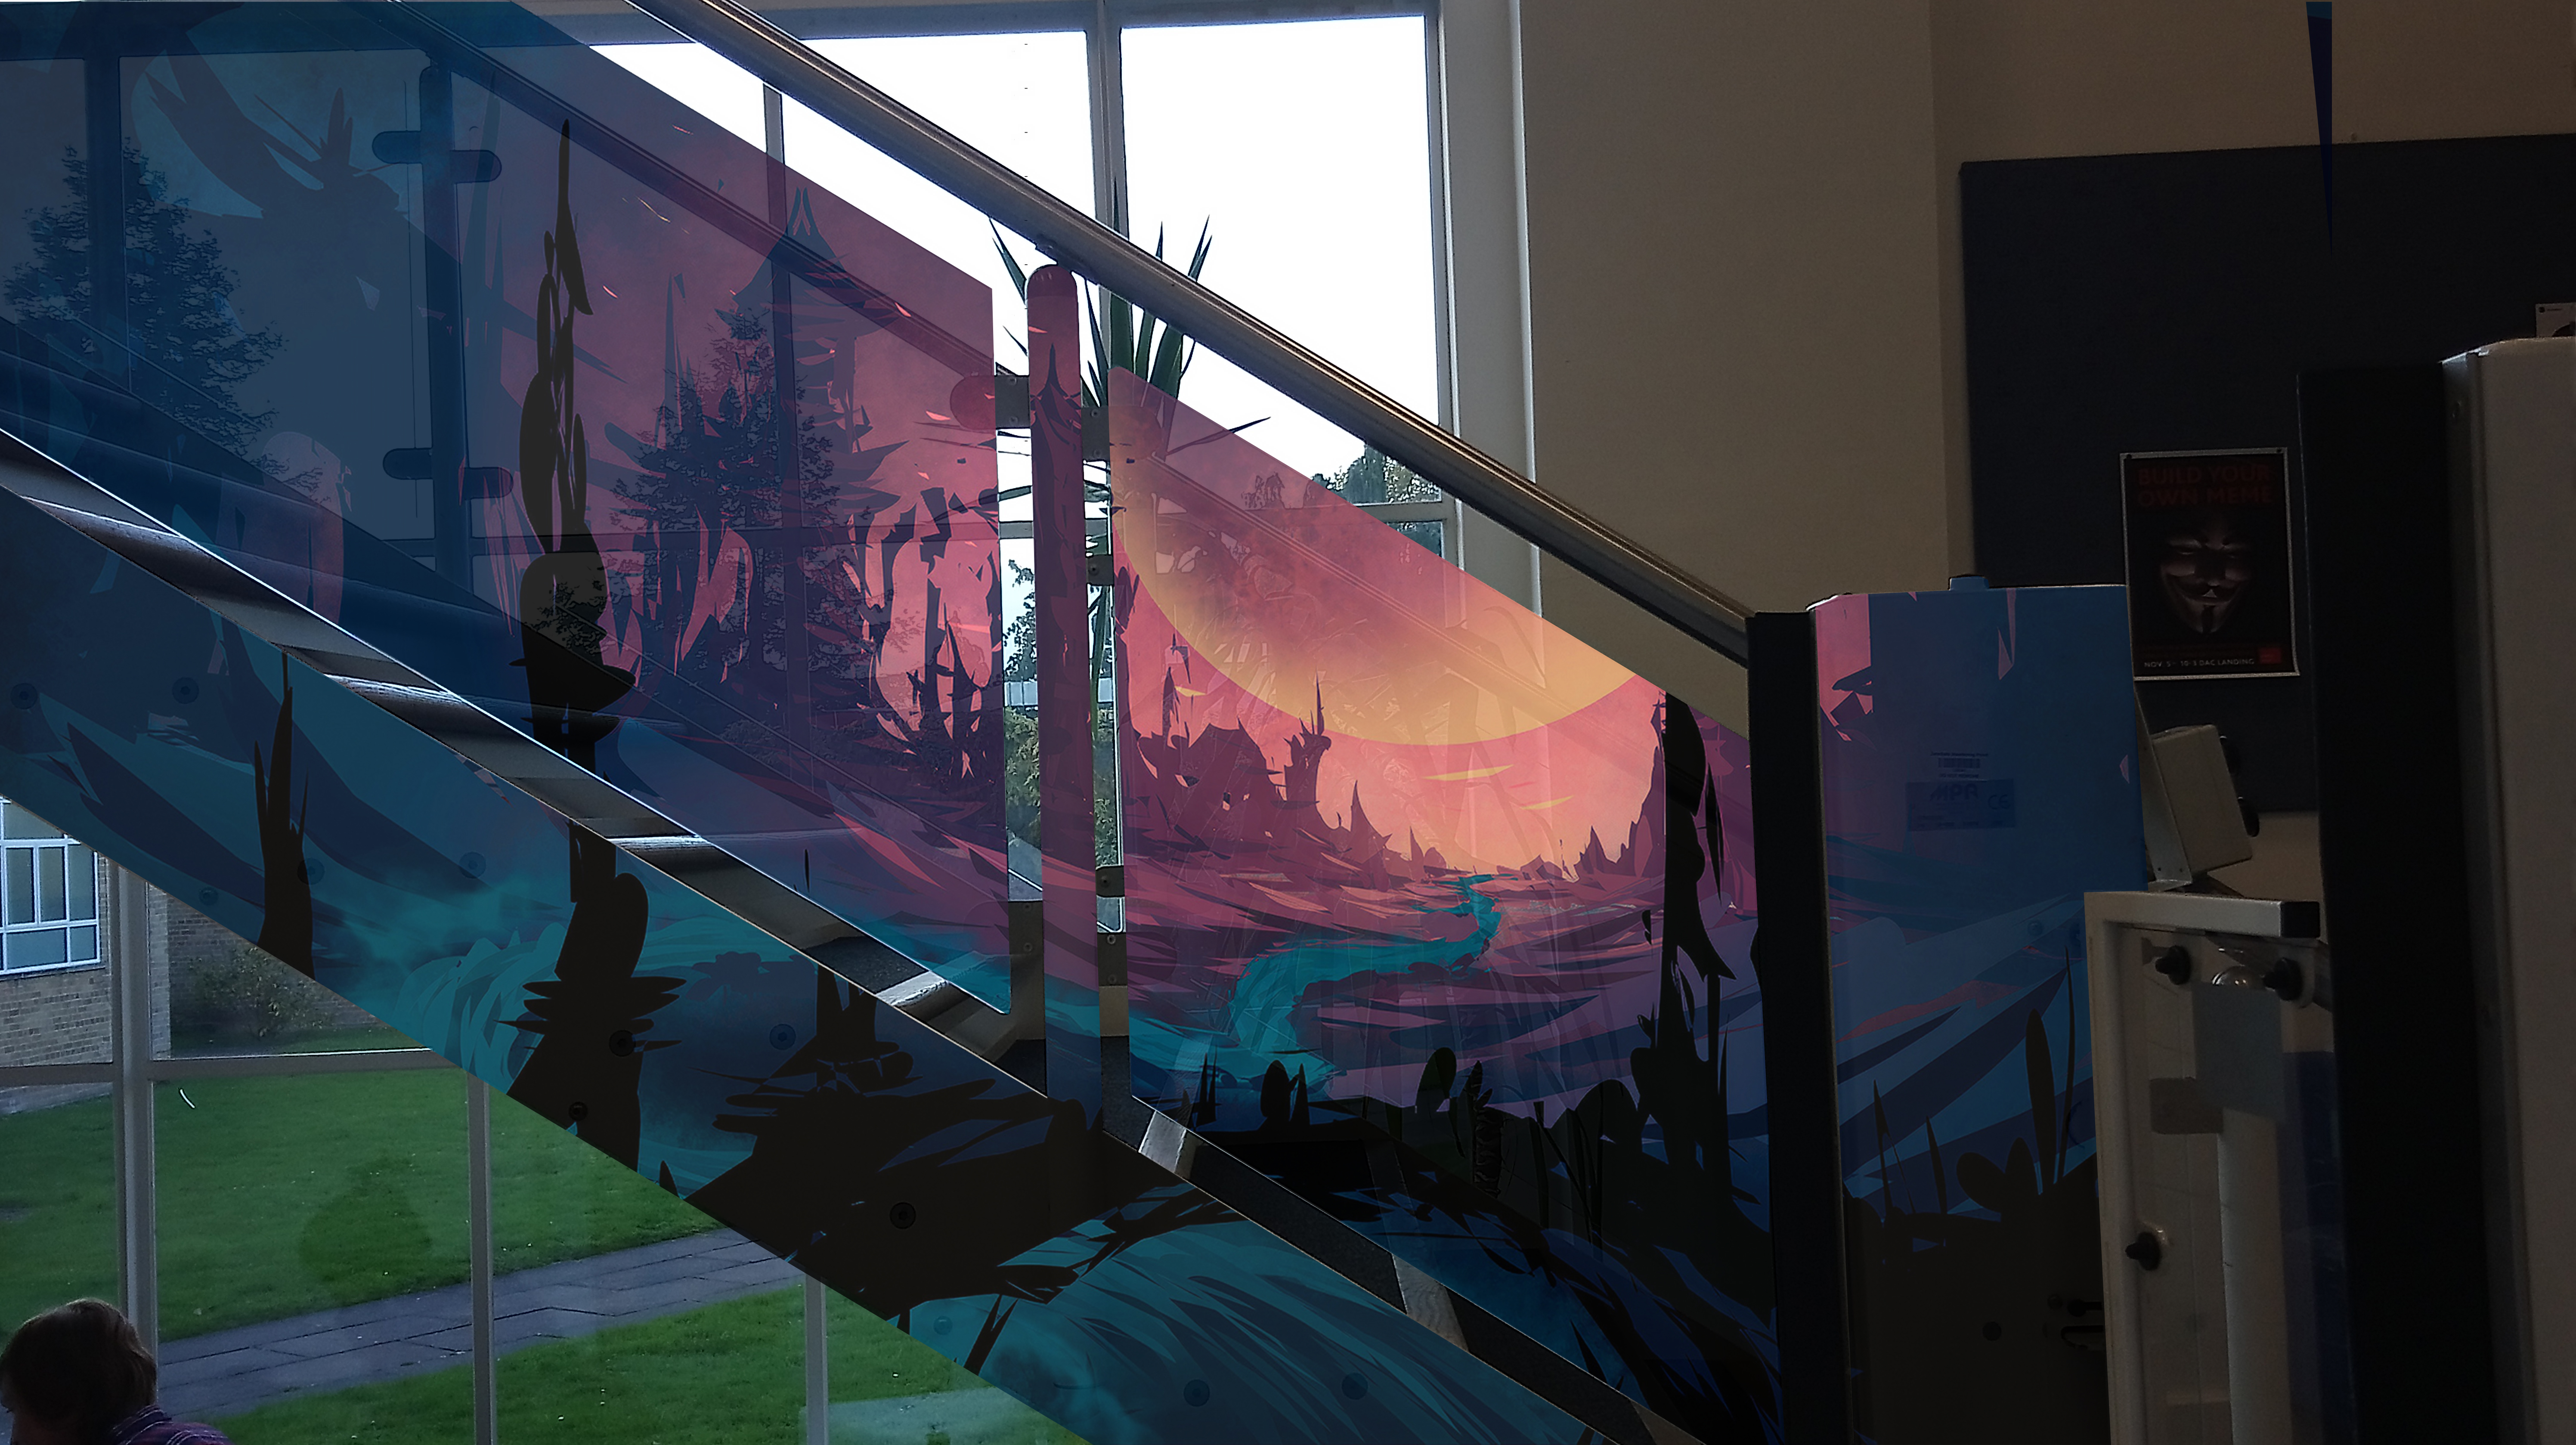
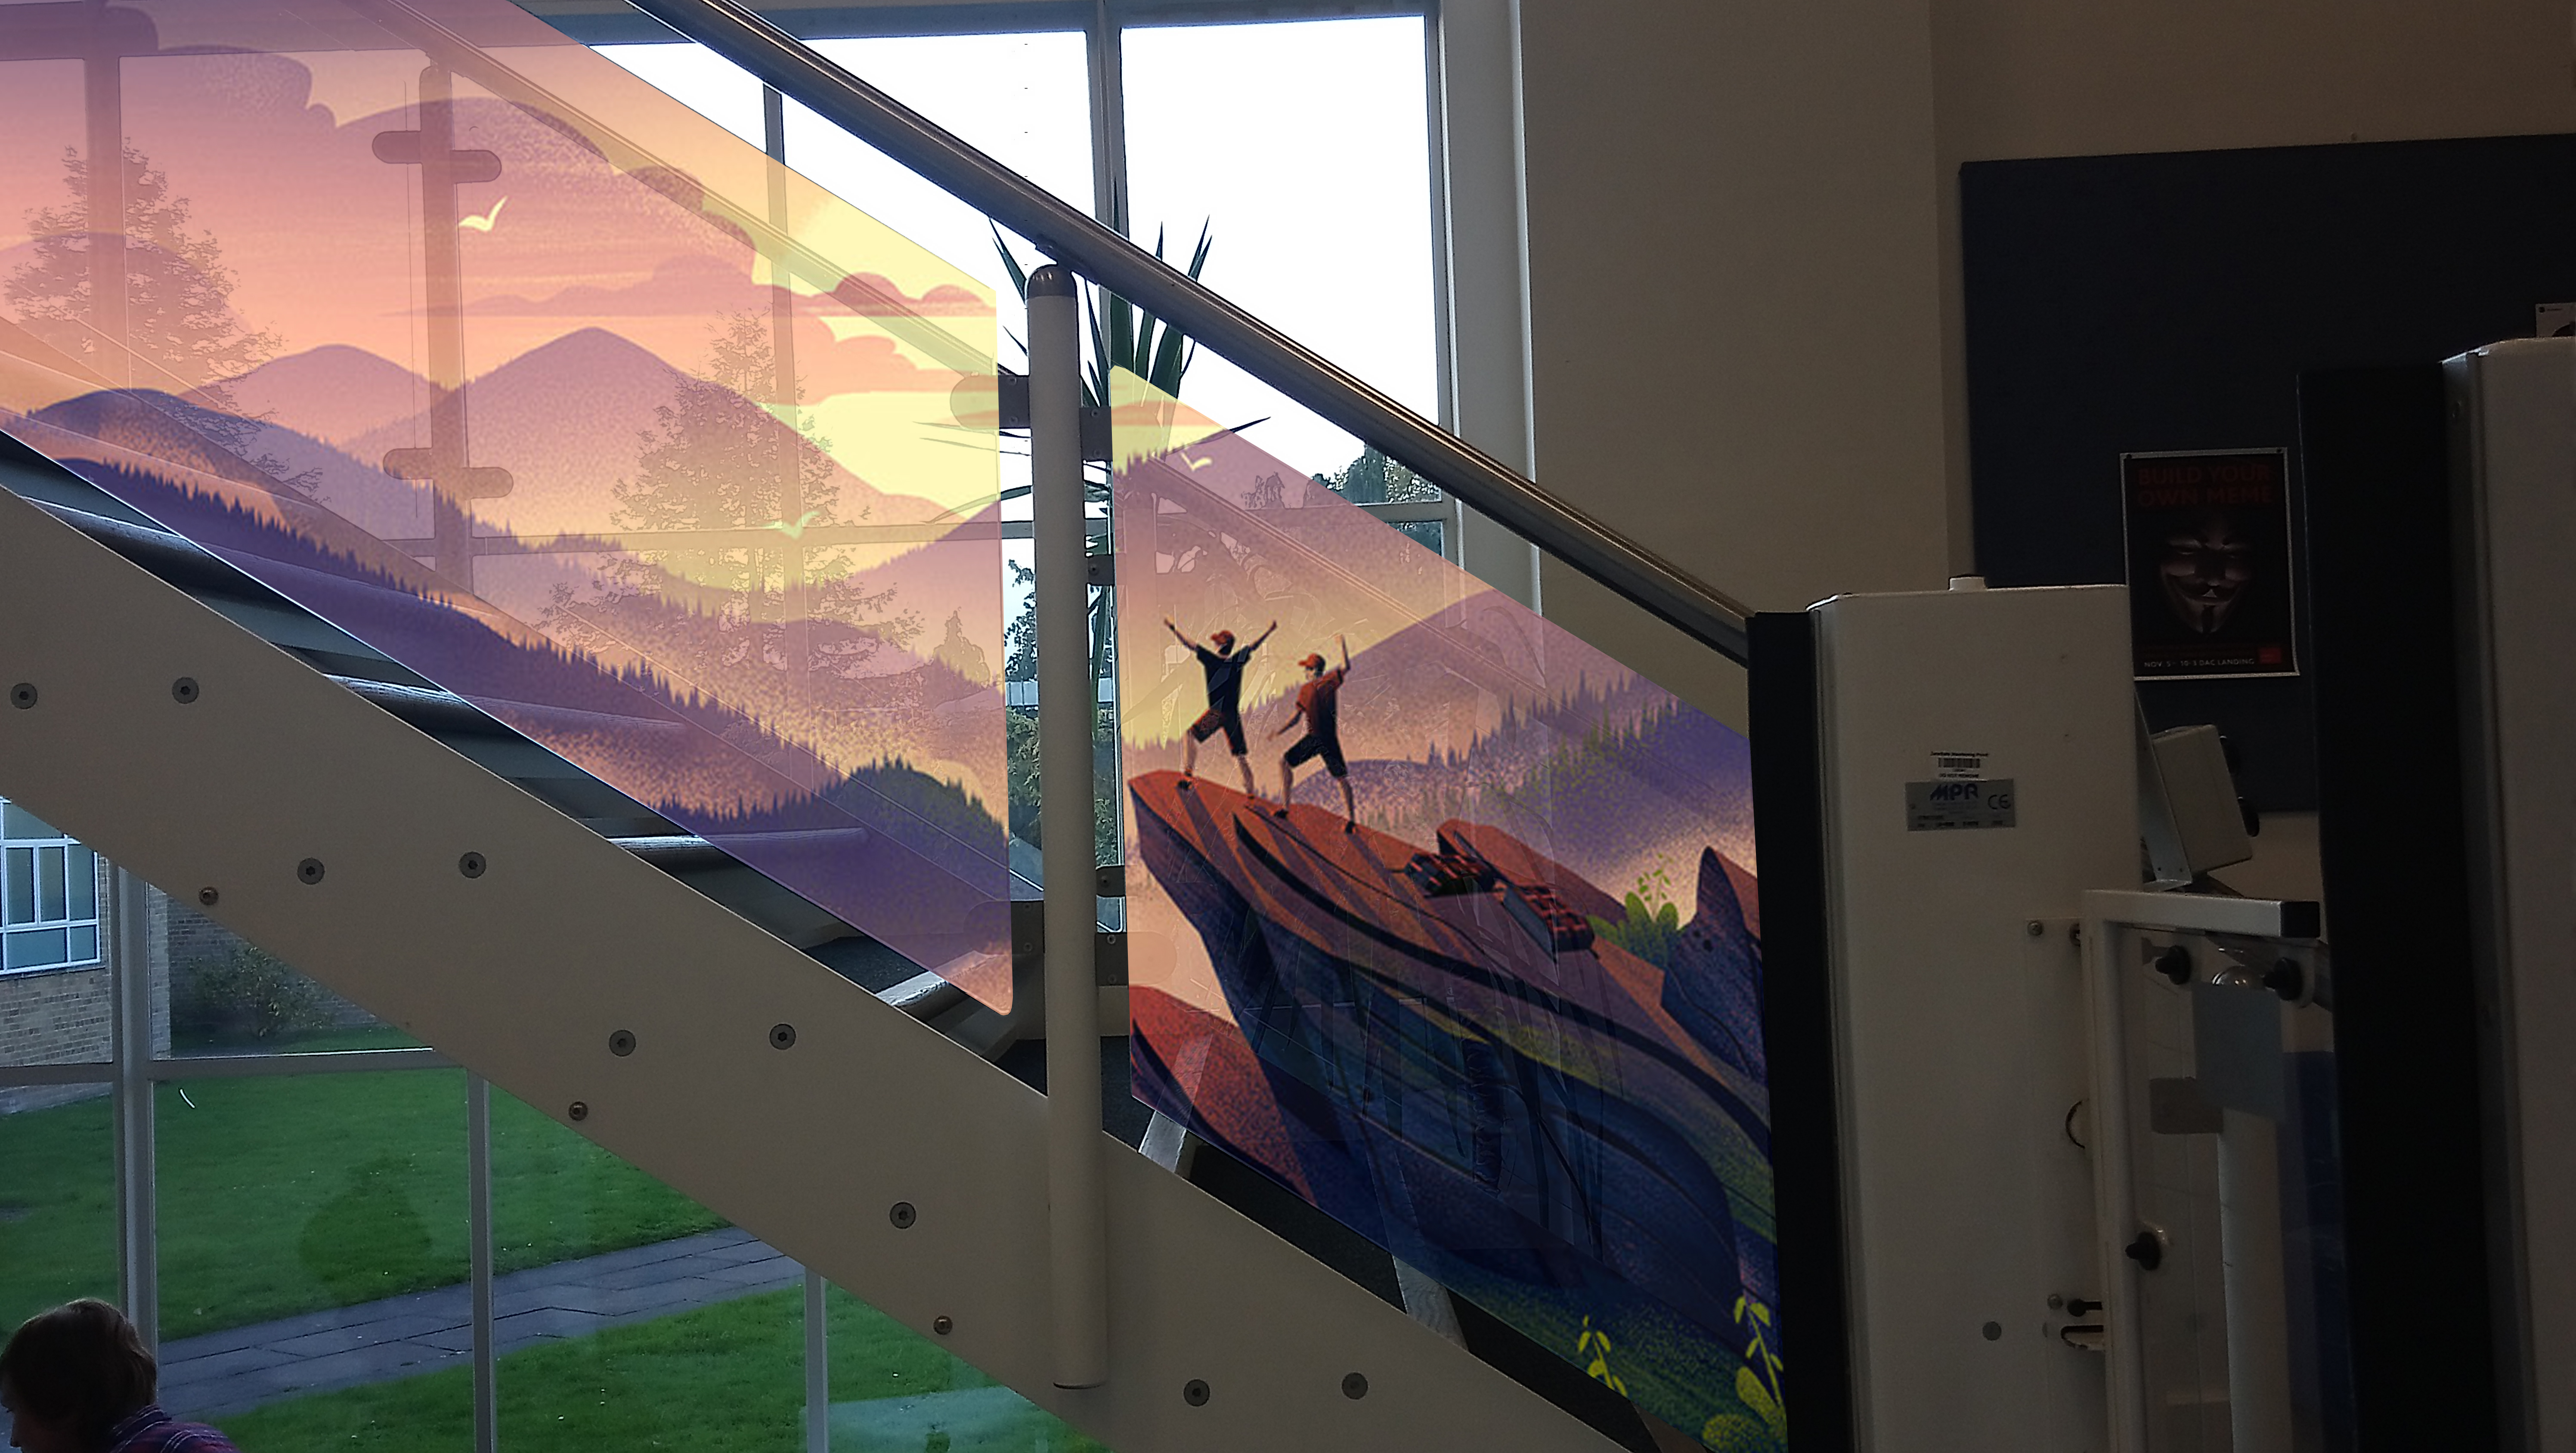
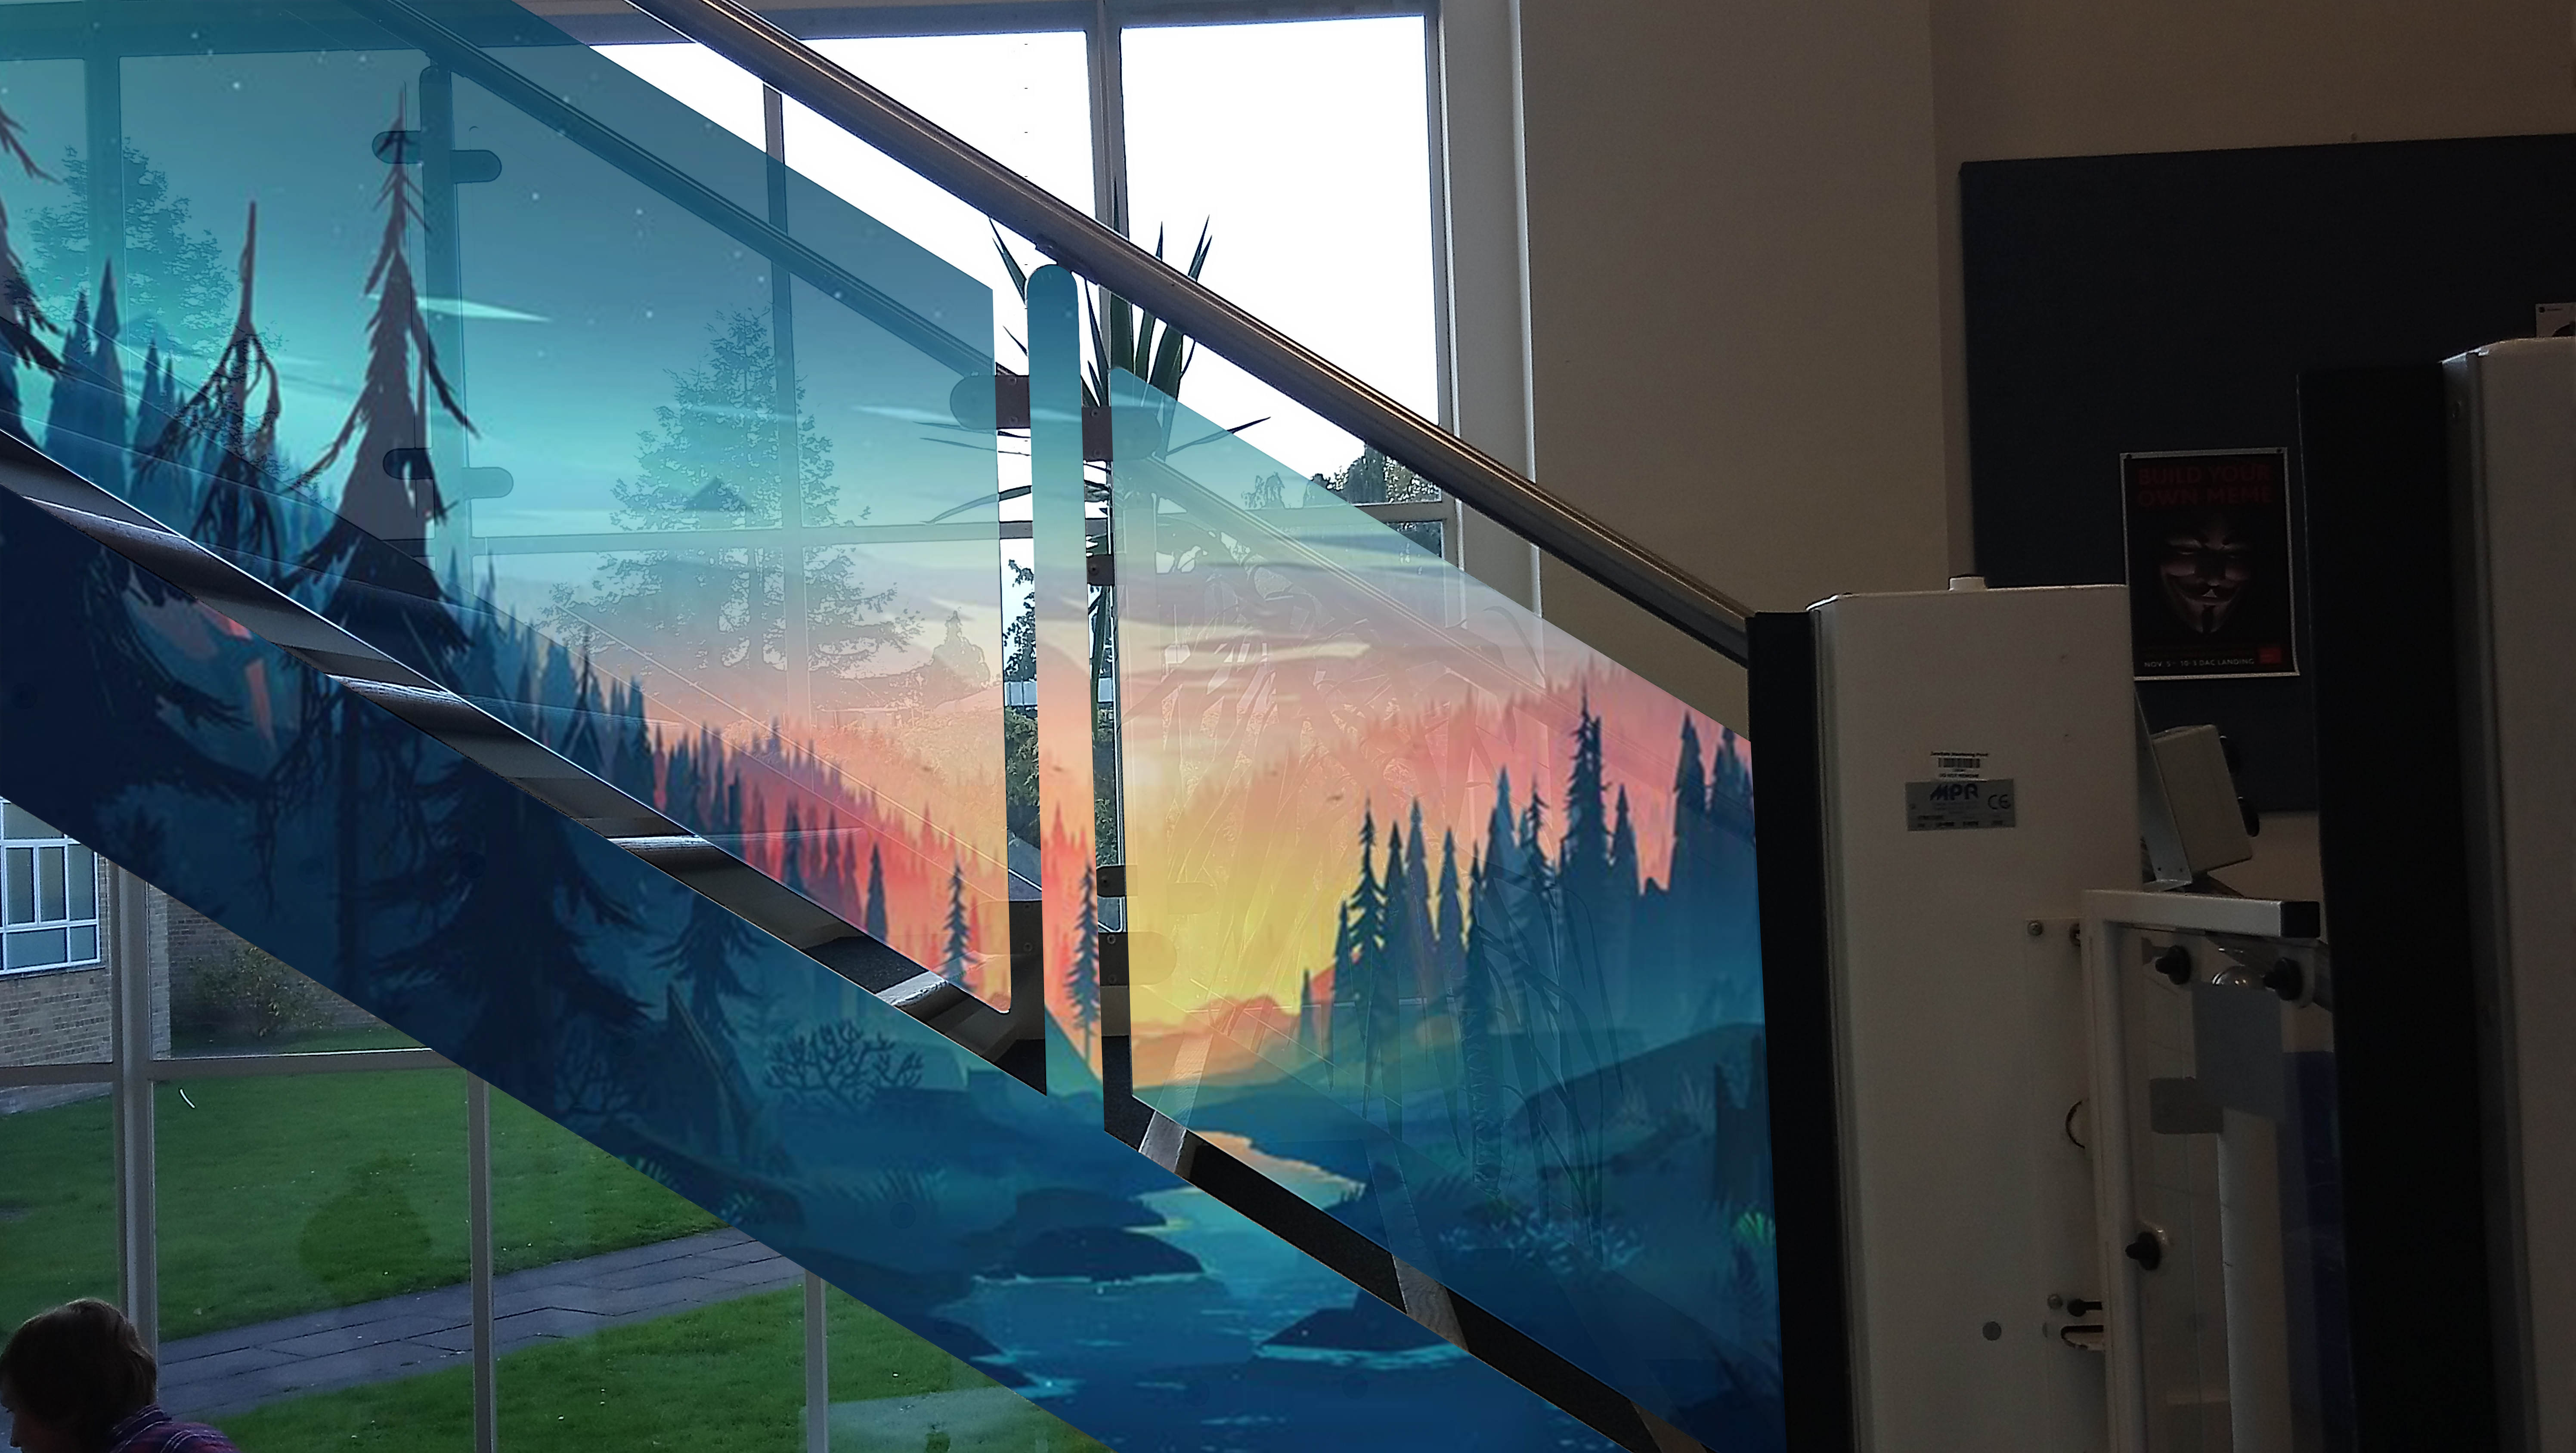
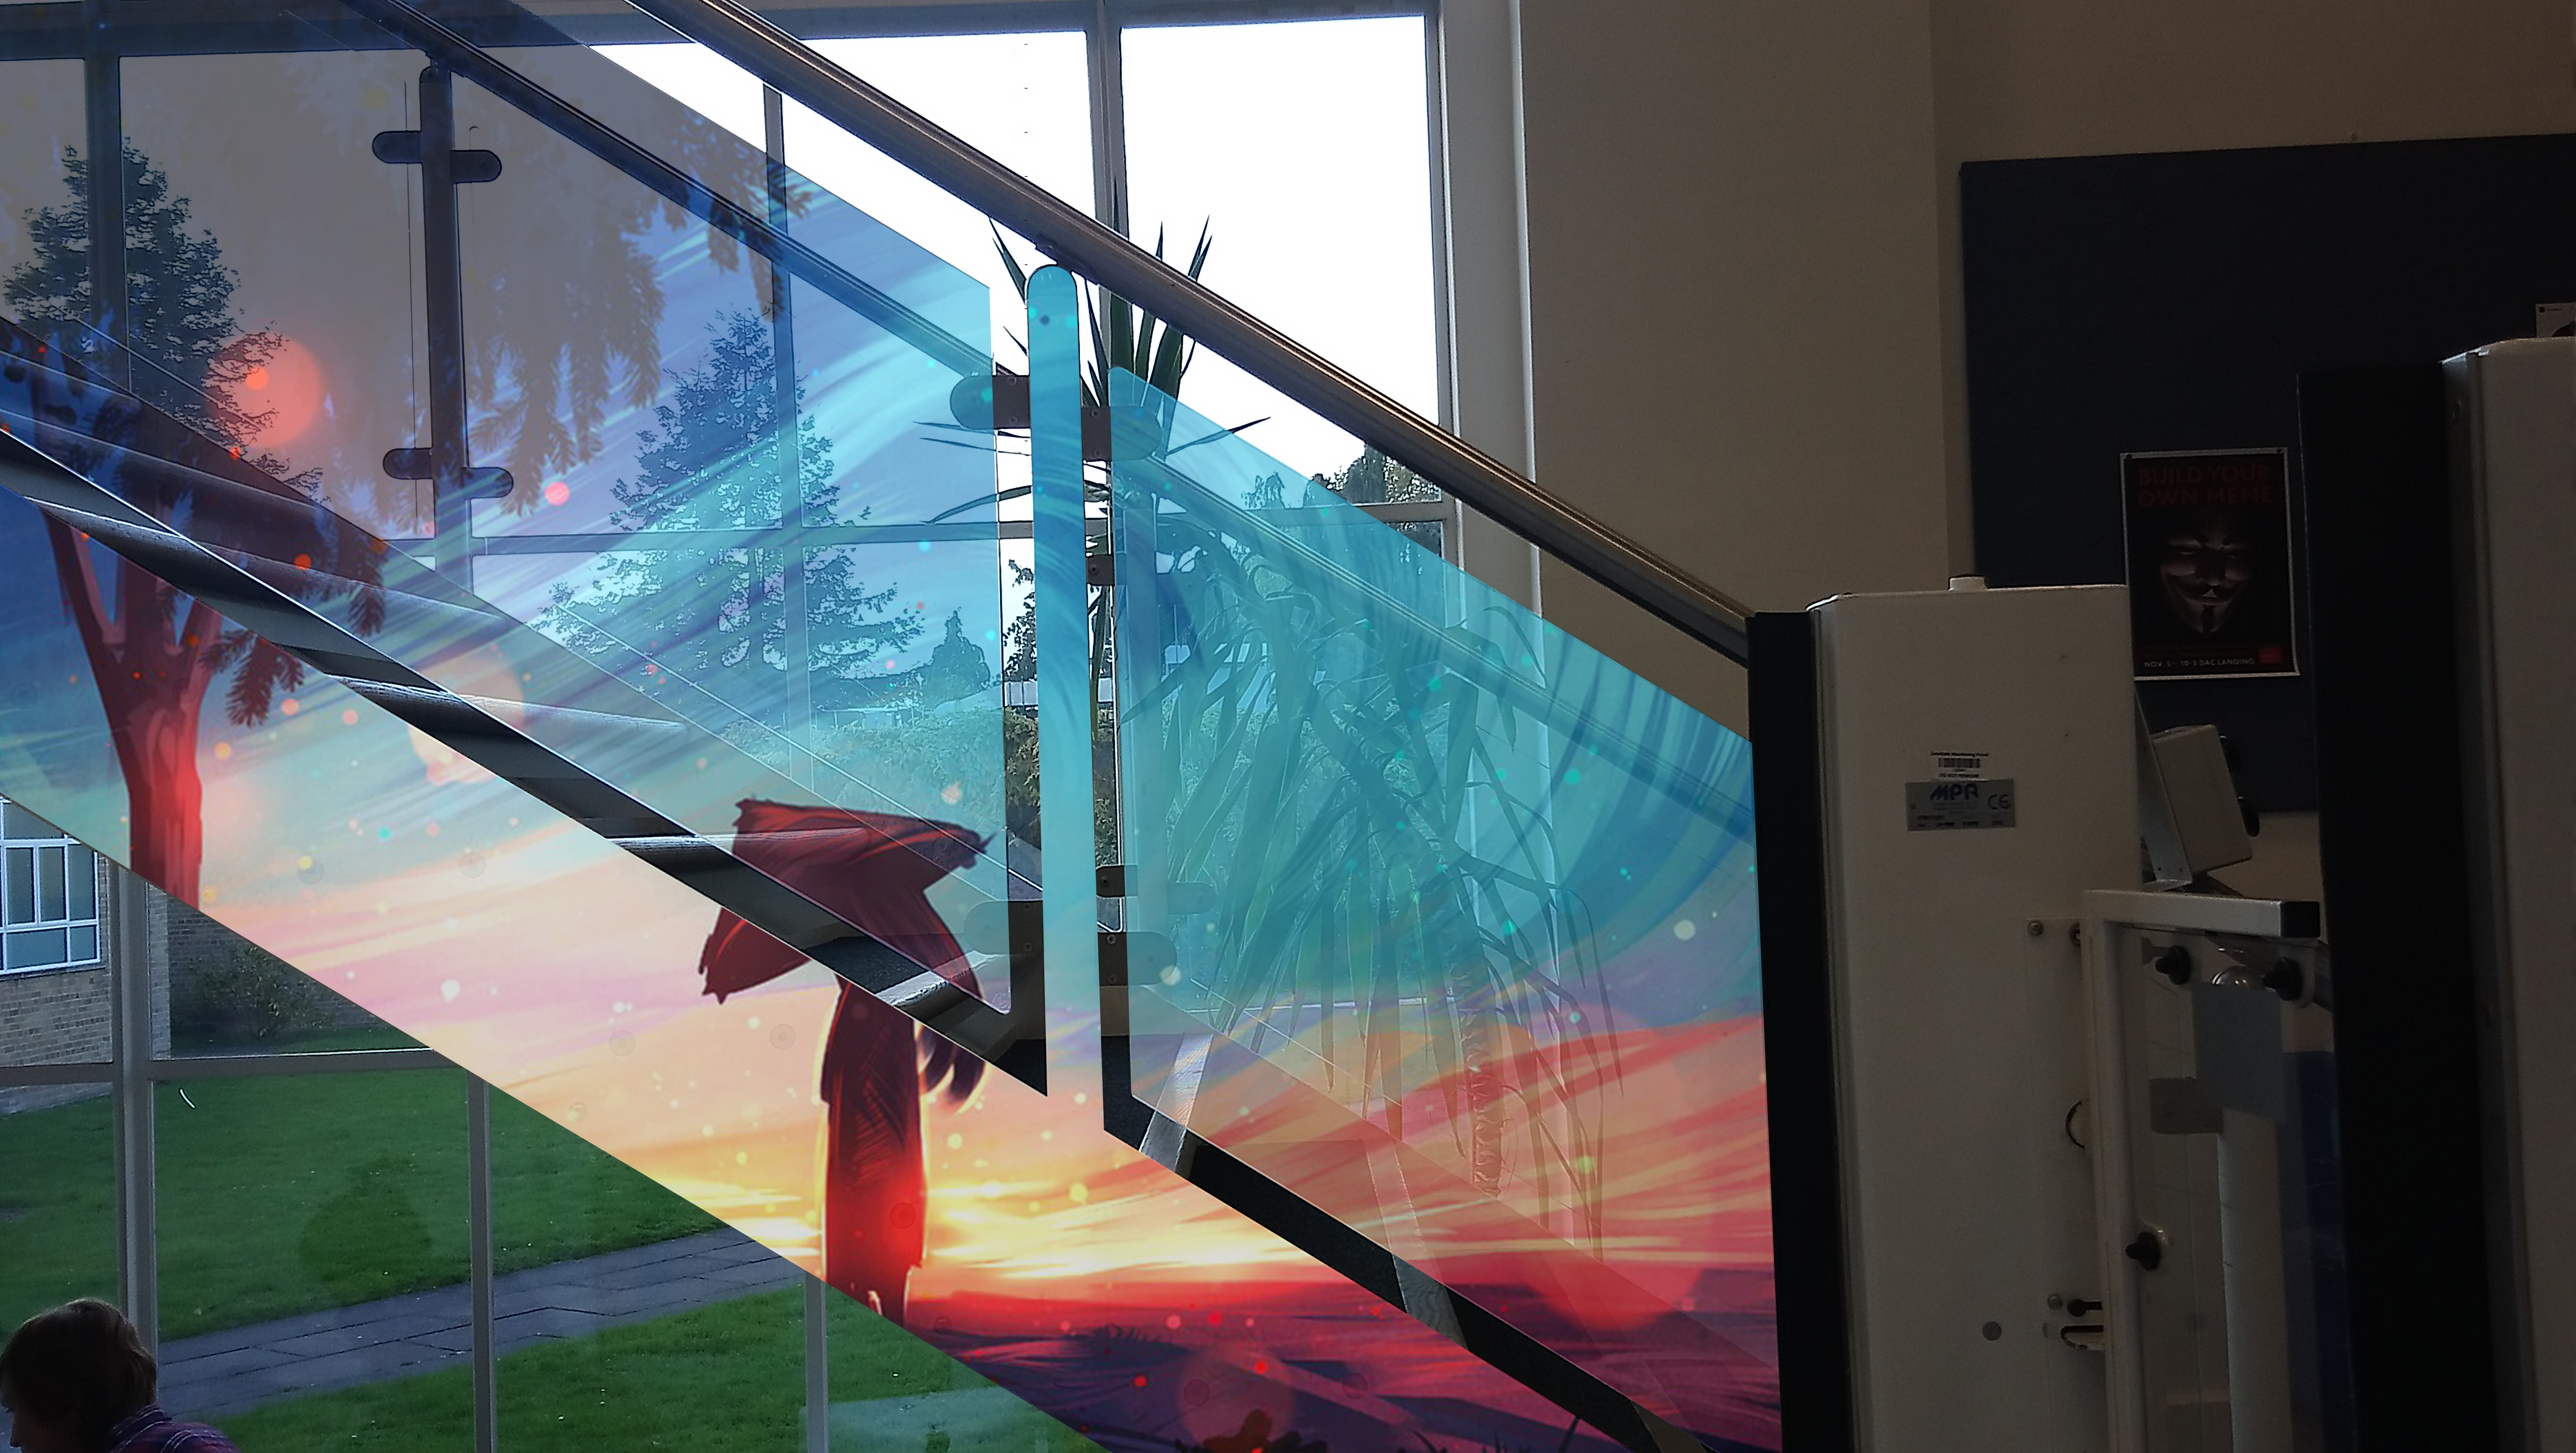
An interesting idea that I had was to utilise the glass connected to the banisters. The way that I wanted to do this was by applying an image to the glass so that the design is cast on the wall when daylight is going through it.

Like ‘Mega Glass’ (http://megaglass.co.uk/product/i-digital-glass/), who designs glass with designs on them and then gives them backlights to illuminate, I would be wanting to use the same effect. This would be achieved using the glass banisters and the daylight coming in from the big window.

Below are a series of examples that I created using sample images off of the internet.

I believe that these examples have demonstrated the artistic glass very well so I attempted to make banners for both the University of Worcester and DRPG and I have created the glass art using the same technique.

Aftermath

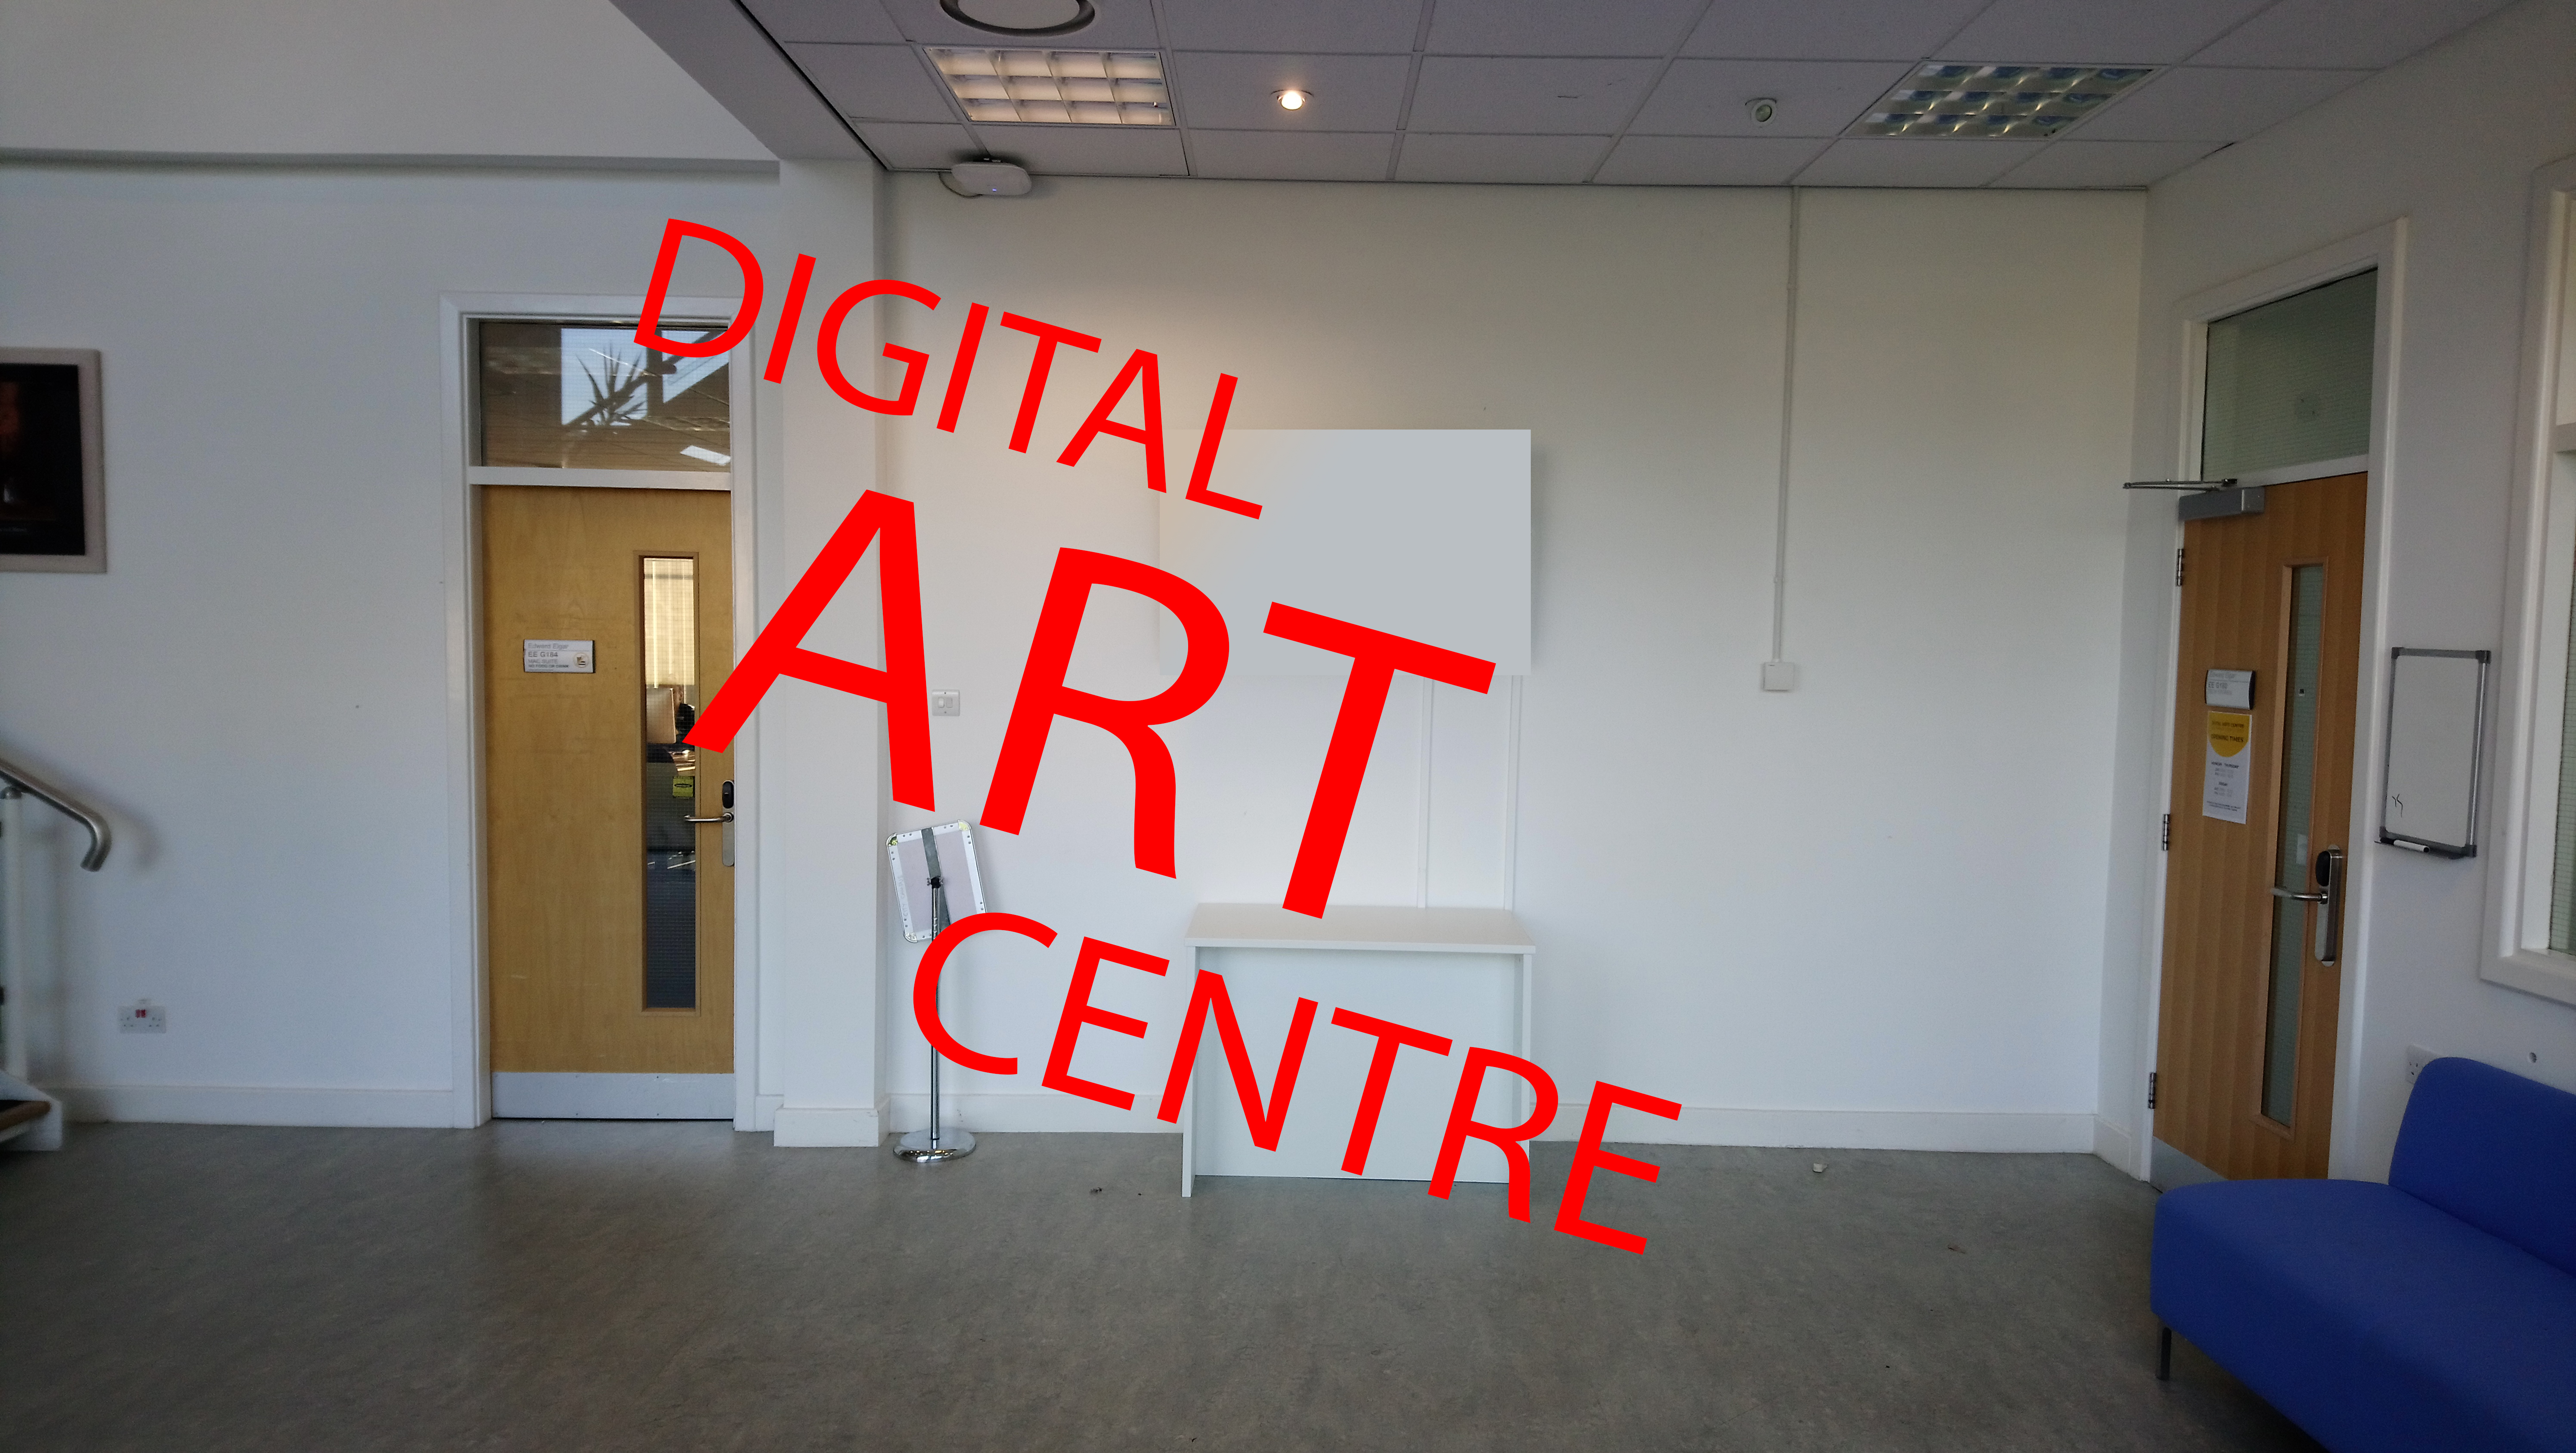
Having met with the clients for a catch-up and demonstration of initial ideas as well as talks with tutors, I thought it would be better if I created a design for words associated with the courses available in the Digital Art Centre as the name could change over time. In addition to that, I also thought of different ways to achieve the optical illusion, such as using 3D pieces on the wall or hanging from the ceiling (possible hazard?) and/or perspex on the DAC glass which will give the illusion more depth because of the added distance from the other parts of it.

Experimentation

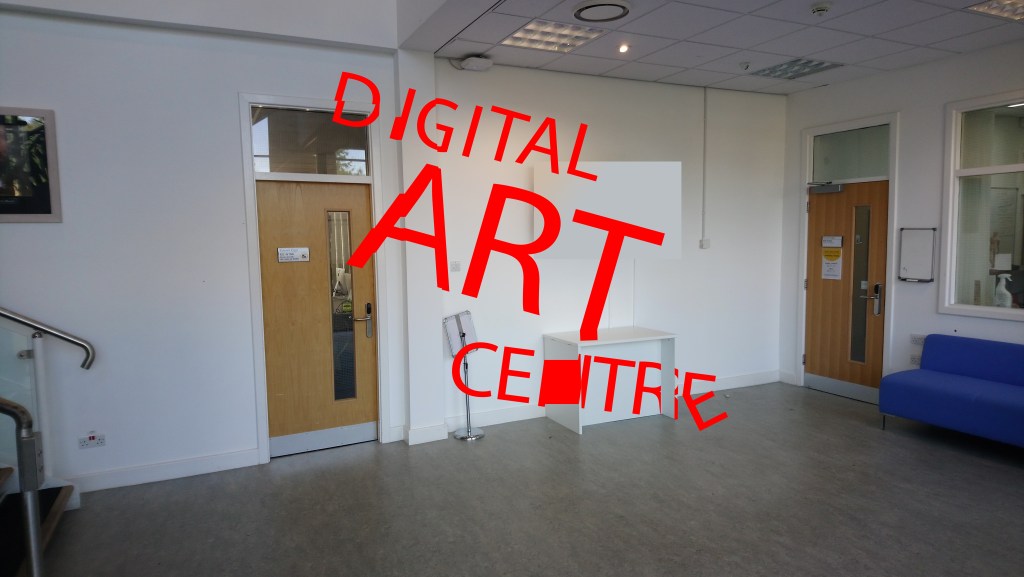
Purely to try and get the idea of what I wanted to do across to the client, I began to try and create a series of Photoshop images of what the main perspective and an offset perspective would look like. Please note that the text, font, sizing and colour is not finalised as I was just attempting to demonstrate the idea I have.

Following on from feedback, I have created this example in After Effects in a video format. This will allow me to show what I would be trying to accomplish more clearly.

A very basic example of how the letters would split up depending on the viewer’s perspective
Design a site like this with WordPress.com
Get started